Nowadays, nearly everyone who keeps pasture animals naturally uses an electric fence.
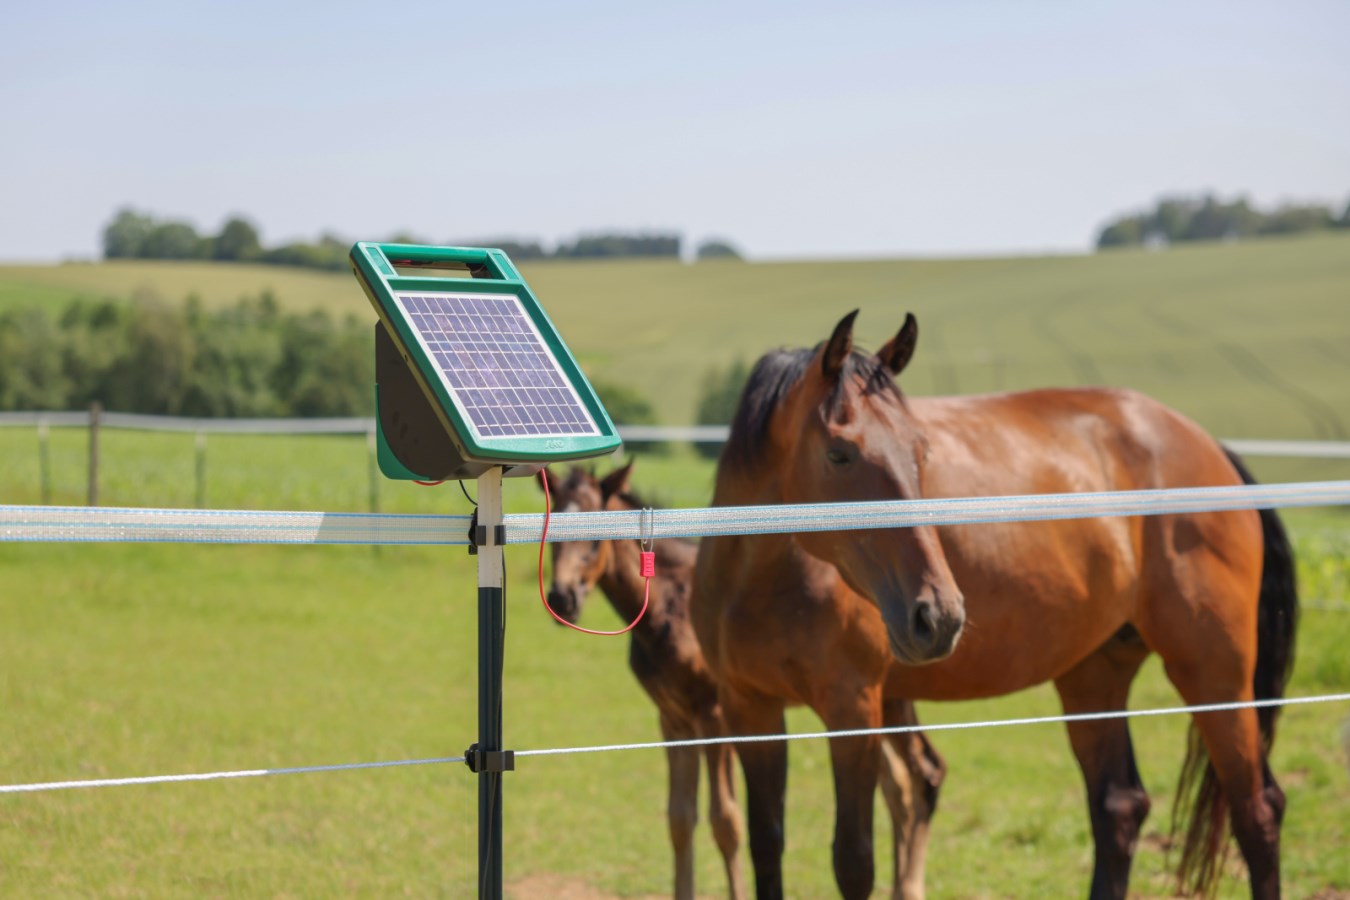
As early as the 1930s, herds were fenced in with electric fences in New Zealand and in the USA. In 1942, Paul Kolb invented the first electric fence device in Germany. The technology continued to evolve, and today there are even solar-powered fence systems and devices with GPS transmitters.
In the beginning, an electric fence consisted of a conductive steel wire. It was quite expensive, very stiff and quite hard to build. Today, fences can be built and repaired much more quickly, easily and cost-effectively with plastic conductor material in the form of wires, ropes and tapes. And in the case of a mobile system, which is used only for the pasture season, you can also quickly dismantle the fence. The current-carrying thin wires are woven into the plastic.
How an Electric Fence Works
The aim of an electric fence is not to inflict pain on the animals, but to create a psychological barrier for the animals. When an animal touches the fence rope or tape, it receives an unpleasant but harmless electric shock. The animal “remembers” the unpleasant shock of the fence and keeps away from it. (Not like we humans 😉
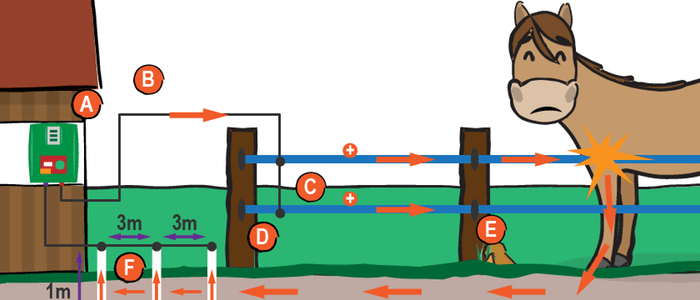
An electric fence consists of the following main components:
The current-generating fence device (A)
The power supply is connected with the conductive material of the electric fence and the ground (B). It generates regular, short, high-voltage pulses, so that there is a voltage between fence and the groud. The circuit is thus not closed. Only when an animal standing on the ground touches the electric fence is the circuit closed and the current flows through the animal and the earth back to the power supply. The animal perceives this current flow as a short shock.
The current-carrying conductive material (C)
Wires made of stainless steel, tin-plated copper or TriCOND braided into plastic are used as conductors. How well the material conducts the current depends on the resistance of the material (measured in Ω). Thus, there is conductive material that is sufficient for smaller mobile pastures while other conductive material is suitable for electric fences with a length of several kilometers. Conductive material made of plastic is much easier to handle and reduces the risk of injury to animals. The conductive material is usually tightened in several vertical rows, each above another.
Fence Posts and Insulators (D and E):
The fence posts give stability to the fence and hold the conductive material. For the electric fence to work properly, the current must not flow into the ground at any point. Otherwise, the voltage would be gone and the animals would not receive an electric shock. The electric fence would be useless. This means that in the case of fence posts made of conductive material, such as wood or steel, the conductive material should not be attached directly to the post, but fixed by so-called insulators, which insulate the conductive material from the fence post. In the case of plastic fence posts, the conductive material can be attached directly to the post.
The Grounding of the Power Supply (F)
A clean grounding is essential so that the current can flow without extra resistance back to the power supply. The grounding consists of at least one steel grounding rod, which is driven 1m deep into the damp earth. In the case of strong electric fences, three grounding rods are driven into the ground at a distance of 3 m. The earth rods are connected to each other in series and to the grounding connection of the power supply. Lack of grounding is a common cause of improperly functioning electric fences.